
Discord has become one of the most popular platforms for online communication, particularly in the gaming community. With its many features, including voice and video chat, text messaging, and the ability to create and join communities called servers, Discord has revolutionized the way people connect and communicate online. One of the newest features Discord has introduced is Galxe (GAL), a powerful tool that aims to make communication even more efficient and seamless.
Galxe is a unique feature that allows Discord users to easily share and collaborate on documents and files within their servers. Whether you’re working on a project with your gaming team or simply want to share some photos or videos with your friends, Galxe provides a convenient and user-friendly way to do so. With Galxe, you can upload files directly to Discord servers and share them with specific individuals or entire communities, making it easier than ever to keep everyone on the same page.
In addition to file sharing, Galxe also enables real-time collaboration on shared documents. This means that multiple users can view, edit, and comment on a document simultaneously, eliminating the need for back-and-forth emails or separate messaging apps. Whether you’re brainstorming ideas, editing a presentation, or working on a spreadsheet, Galxe’s collaboration features make it easy to work together efficiently and effectively.
To use Galxe, simply navigate to the server where you want to share a file or collaborate on a document. Click on the Galxe icon in the left sidebar to open the Galxe panel. From there, you can upload files, create new documents, or select existing documents from your Galxe library. Once you’ve uploaded or selected a file, you can choose who to share it with, whether it’s an individual user or an entire server.
In conclusion, Galxe is a valuable addition to Discord’s already impressive lineup of features. With its intuitive interface and powerful collaboration tools, Galxe makes it easier than ever to communicate and work together efficiently. Whether you’re a gamer, a student, or a professional, Galxe can streamline your communication and help you stay connected with others in a seamless and productive way.
Section 1: Setting up Discord Galxe

Discord Galxe is a powerful communication tool for individuals and communities. By following a few simple steps, you can quickly set up your Discord Galxe and start enjoying its features.
1. Download and install Discord Galxe: Visit the official Discord website and download the Galxe application that suits your operating system. Once the download is complete, run the installer and follow the on-screen instructions to install Galxe on your device.
2. Create a Discord account: Launch the Galxe application and click on the “Register” button. Fill in the required details, including your email address, desired username, and password. Make sure to choose a strong password to secure your account.
3. Verify your email address: After creating your account, Discord will send a verification email to the address you provided. Open the email and click on the verification link to confirm your account. This step is crucial to ensure the security of your Discord Galxe account.
4. Customize your profile: Once your account is verified, you can customize your profile. Upload a profile picture and add a catchy bio to let others know more about you. You can also personalize your profile by adding roles and setting your online status.
5. Join or create a server: Discord Galxe operates on servers, which are communities where you can interact with others. You can either join an existing server by accepting an invitation or create your own server for your friends, colleagues, or community. To join a server, click on the “+” button in the left sidebar and enter the invitation link. To create a server, click on the “+” button and follow the prompts to set it up.
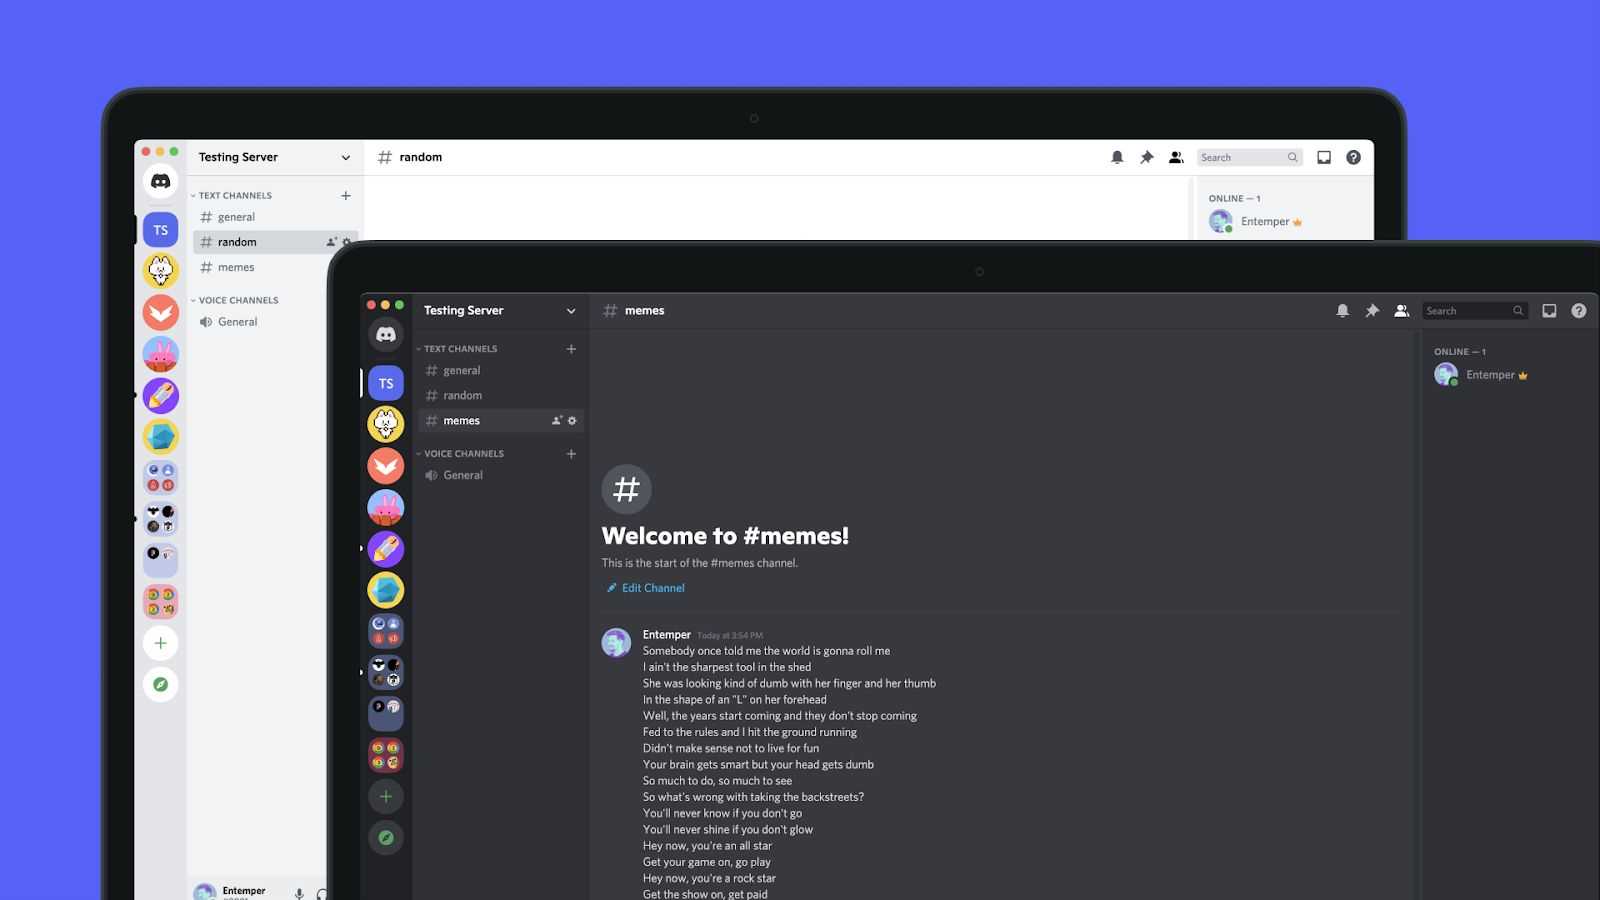
6. Familiarize yourself with the interface: Take some time to explore the Discord Galxe interface. Familiarize yourself with the different panels, such as the server list, channel list, and user list. Learn how to navigate through the various features, such as voice channels, text channels, and direct messaging. Understanding the interface will help you make the most out of Discord Galxe.
7. Set up notifications and privacy settings: Adjust the notification and privacy settings according to your preferences. You can choose to receive notifications for all messages, mentions, or only direct messages. You can also set privacy options, such as who can send you friend requests or direct messages. Customizing these settings will ensure a comfortable and efficient communication experience.
8. Explore additional features: Discord Galxe offers numerous features to enhance your communication. Take the time to explore features such as voice chats, screen sharing, file sharing, and integrations with other applications. Experiment with these features to find the ones that best suit your needs and improve your communication efficiency.
With these steps, you can easily set up your Discord Galxe and start using it for efficient communication with others. Whether you use it for personal or professional purposes, Discord Galxe will undoubtedly enhance your communication experience.
Step 1: Download and Install Discord Galxe

To start using Discord Galxe for efficient communication, you will first need to download and install the application. Follow these steps to get started:
1. Visit the Official Discord Galxe Website
Open your preferred web browser and navigate to the official Discord Galxe website at discordgalxe.com.
2. Download the Application
Once on the official website, locate the download button and click on it. This will initiate the download of the Discord Galxe installer.
3. Run the Installer
Once the download is complete, locate the downloaded file on your computer and double-click on it to run the installer.
4. Follow the Installation Wizard
Follow the on-screen prompts provided by the installation wizard to complete the installation process. Make sure to carefully read and accept the terms and conditions before proceeding.
5. Launch the Application
After the installation is finished, a shortcut icon for Discord Galxe will be created on your desktop. Double-click on the icon to launch the application.
Congratulations! You have successfully downloaded and installed Discord Galxe. You are now ready to start using it for efficient communication with your team or community.
А
Step 2: Create a Discord Galxe Account
Creating a Discord Galxe account is the next crucial step in effectively using this platform for communication. Follow these simple steps to get started:
1. Go to the Discord Galxe Website
Open your preferred web browser and navigate to the official Discord Galxe website. The website URL is www.discordgalxe.com.
2. Sign Up
Click on the “Sign Up” button located on the homepage. You will be redirected to the sign-up page.
3. Fill in the Required Information
Provide the necessary information, including your desired username, email address, and password. Make sure to choose a strong and unique password to ensure the security of your account.
4. Read and Accept the Terms of Service
Read through the terms of service provided by Discord Galxe. It is essential to understand and agree to the terms before proceeding. If you have any doubts or concerns, feel free to contact the Discord Galxe support team.
5. Verify Your Email Address

After completing the registration form, a verification email will be sent to the email address you provided. Open your email inbox and click on the verification link to validate your account.
Congratulations! You have successfully created a Discord Galxe account. Now you can proceed to use the platform for efficient and effective communication.
Step 3: Customize Discord Galxe Settings

1. Accessing the Settings
Once you have installed Discord Galxe, you can customize its settings to suit your needs. To access the settings, click on the gear icon at the bottom left corner of the Discord app window. This will open the Discord settings menu.
2. General Settings
In the settings menu, you will find various options to customize Discord Galxe. One of the sections you will come across is the “General Settings” section. Here, you can modify settings related to your profile, such as your username, avatar, and status.
3. Notification Settings
Another important section in the settings menu is the “Notification Settings” section. Here, you can control how you receive notifications from Discord Galxe. You can choose to receive notifications for mentions, direct messages, and server activity. You can also adjust the notification sound and enable or disable push notifications.
4. Appearance Settings
The “Appearance Settings” section allows you to customize the look and feel of Discord Galxe. You can choose the theme, change the font size, and even customize the behavior of the user interface. Discord Galxe offers a variety of themes to choose from, so you can find the one that suits your style.
By customizing the appearance settings, you can make Discord Galxe more visually appealing and comfortable for your eyes.
5. Privacy and Security Settings
Discord Galxe also provides privacy and security settings to protect your account and personal information. In the “Privacy and Security Settings” section, you can enable two-factor authentication, set up a security PIN, and adjust your account visibility.
It is important to review and configure these settings to ensure the security of your account and protect your privacy.
Overall, Discord Galxe offers a range of customization options to enhance your communication experience. By adjusting the settings to your preferences, you can create a more personalized and efficient communication environment on Discord.
Section 2: Joining and Creating Galxe Servers
Once you have downloaded and installed the Galxe application on your device, you can start joining and creating Galxe servers to communicate with others efficiently. Here’s how:
Joining a Galxe Server
- Launch the Galxe application on your device.
- Click on the “Servers” option on the left sidebar.
- In the “Servers” tab, click on the “+” button at the bottom of the server list.
- A new window will appear where you can enter the server invitation link or code.
- Copy the server invitation link or code from the administrator or server owner.
- Paste the invitation link or code into the input field and click “Join” to join the Galxe server.
- You will be directed to the server’s channel list, where you can start participating in discussions and conversations.
Creating a Galxe Server
- Launch the Galxe application on your device.
- Click on the “Servers” option on the left sidebar.
- In the “Servers” tab, click on the “+” button at the bottom of the server list.
- A new window will appear where you can enter the server information.
- Enter the desired server name and choose an appropriate server region.
- Optionally, you can also set the server image by clicking on the server thumbnail.
- Once all the information is provided, click “Create” to create the Galxe server.
- You will be directed to the server’s channel list, where you will be the administrator and can manage permissions and settings.
By joining and creating Galxe servers, you can easily communicate and collaborate with others who share similar interests or work in the same community.
Step 1: Joining Existing Galxe Servers
To begin using Discord Galxe (GAL) for efficient communication, the first step is to join existing Galxe servers. Galxe servers are communities focused on specific topics or interests, and joining them allows you to connect with like-minded individuals and engage in discussions.
Finding Galxe Servers
The easiest way to find Galxe servers is by using the Discord search function. To do this:
- Open the Discord application or website
- Click on the plus icon on the left-hand menu to open the server discovery page
- In the search bar, type keywords related to your interests or the topic you’re looking for
- Click enter to see a list of Galxe servers matching your search
Alternatively, you can find Galxe servers through online communities, forums, or by asking friends who are already part of the Discord community.
Joining a Galxe Server
Once you have found a Galxe server that interests you, joining it is simple:
- Click on the server’s name or icon to open its page
- Review the server’s description, rules, and guidelines
- If you agree to the server’s terms, click the “Join Server” button
- You may be asked to solve a CAPTCHA to ensure you are not a bot
- After completing the CAPTCHA, you will be a member of the Galxe server
Keep in mind that some Galxe servers may require additional steps for verification or have specific membership requirements. Make sure to read the server’s instructions carefully to avoid any issues.
Congratulations! You have successfully joined an existing Galxe server and can now start exploring the community, participating in discussions, and connecting with like-minded individuals.
Step 2: Creating a Galxe Server

To start utilizing Discord Galxe (GAL) for efficient communication, you’ll need to create a Galxe server. Follow the steps below to create your own Galxe server and start connecting with your team members:
1. Open Discord: Launch the Discord desktop application or visit the Discord website and log in to your account.
2. Click on the ‘+’ symbol: On the left sidebar, you’ll find a plus sign (+) next to the server list. Click on it to create a new server.
3. Choose “Create My Own” or “Create a Server”: Discord offers two options for server creation. Select “Create My Own” if you want to create a server from scratch or “Create a Server” if you want to base it on a pre-made template.
4. Customize server settings: Enter a unique and descriptive name for your Galxe server. You can also add an optional server icon to make it more visually appealing. After that, click on the “Create” button to proceed.
5. Manage server settings: Once your server is created, you’ll be redirected to the server management page. Here, you can customize various settings such as roles, permissions, channels, and integrations. Take some time to configure these settings according to your team’s requirements.
6. Share the server invite: To invite your team members to join your Galxe server, click on the “Invite People” button. You can generate a server invite link and share it with your team via email, messaging apps, or any other preferred communication method.
7. Start collaborating: Once your team members join the Galxe server using the invite link, you can start efficient communication by utilizing the features provided by Discord Galxe (GAL). Encourage your team members to set their roles, customize their profiles, and explore the various channels available in the server.
Note: The process mentioned above may vary slightly based on the Discord application version or updates. However, the fundamental steps for creating a Galxe server should remain the same.
By following these steps, you have successfully created a Galxe server on Discord. Now you can enjoy streamlined communication within your team and take advantage of the advanced features offered by Discord Galxe (GAL).
Step 3: Managing Galxe Server Settings

Once you have set up your Galxe server and invited your team members, it’s important to manage the server settings to ensure efficient communication and smooth collaboration. The Galxe server settings allow you to customize various aspects of your server according to your team’s needs.
To manage Galxe server settings, follow these steps:
1. Open the Galxe server settings:
In the Discord application, navigate to your Galxe server.
Click on the server name at the top-left corner of the screen to open the dropdown menu.
Select the “Server Settings” option from the dropdown menu.
2. Customize server information:
Under the “Overview” tab in the server settings, you can modify the server name, region, and verification level.
Choose a descriptive and easily recognizable name for your server.
Select a server region that is geographically close to your team members to minimize latency.
Choose an appropriate verification level to ensure that only desired individuals can access your server.
3. Configure user roles:
Click on the “Roles” tab in the server settings to manage user roles.
Add new roles by clicking the “+” button, and assign appropriate permissions to each role.
You can create roles based on different team members’ responsibilities, such as moderators, administrators, or general members.
4. Fine-tune channel settings:
Navigate to the “Channels” tab in the server settings to customize channel-specific settings.
Manage channel permissions by clicking on the gear icon next to each channel.
Specify who can view, send messages, manage members, and perform other actions in each channel.
Create new channels or delete existing ones according to your team’s communication needs.
5. Enable Galxe features:
Under the “Galxe” tab in the server settings, you can enable or disable various Galxe features.
Choose whether to enable Galxe quotes, reactions, polls, announcements, or other available features.
Enabling or disabling specific features can help streamline communication and tailor it to your team’s preferences.
By effectively managing your Galxe server settings, you can create an environment that fosters efficient communication and collaboration among your team members. Take the time to customize the settings to best suit your team’s needs and preferences.
Section 3: Utilizing Galxe Channels and Categories
Discord Galaxy (GAL) provides users with a variety of channels and categories to enhance communication within a server. By effectively utilizing these features, you can streamline discussions, organize topics, and improve overall collaboration.
1. Channels: GAL offers various types of channels, each serving a specific purpose. Text channels allow for text-based conversations, where members can discuss topics, share information, and ask questions. These channels can be organized based on different areas of interest or projects, enabling easy navigation and focused discussions.
2. Voice Channels: In addition to text channels, GAL provides voice channels for real-time voice conversations. These channels are perfect for hosting meetings, brainstorming sessions, or casual voice chats with other members. By utilizing voice channels, you can ensure quick and efficient communication without the need for external voice communication tools.
3. Categories: Categories in GAL are used to group related channels together, making it easier to locate and access specific topics. By organizing channels into relevant categories, you can create a more structured server layout, allowing members to find and contribute to discussions more efficiently.
4. Announcement Channels: GAL also offers specialized announcement channels. These channels are designed for important announcements, server updates, or community-wide information sharing. Utilizing announcement channels allows you to effectively convey important messages to all members, ensuring that everyone is well-informed.
5. Permissions: GAL provides a robust permission system that allows server administrators to control access and privileges for different channels and categories. This feature is particularly useful for ensuring privacy, organizing discussions based on roles, and maintaining server security.
By understanding and utilizing the variety of channels and categories offered by GAL, you can optimize communication within your Discord server. This level of organization and efficiency enhances collaboration, fosters community engagement, and promotes a seamless communication experience for all members.
Step 1: Understanding Galxe Channels and Categories
In order to make the most of Discord Galxe (GAL) for efficient communication, it is important to understand the concept of Galxe channels and categories. Channels and categories provide a structured way to organize conversations and keep discussions focused. Here’s a breakdown of how they work:
1. Channels
A Galxe channel is a dedicated space within a server where specific conversations can take place. It can be used to discuss a particular topic, collaborate on a project, or simply chat with fellow members. Each channel has specific permissions and settings that can be customized based on the needs of the server. For example, you can create separate channels for general discussions, announcements, voice chats, or even specific topics such as gaming, coding, or music.
2. Categories
A Galxe category is a way to group related channels together. It provides an organized structure to your server and helps in maintaining a clutter-free environment. Categories can be created to represent different areas or departments within a server, or simply to group similar channels together. For example, you can create a category called “Projects” and place all project-related channels under it, making it easier for members to navigate and find specific discussions.
To create a new channel or category, simply click on the “+” button next to the respective section in the server’s sidebar. You can then choose the appropriate settings and permissions for the channel or category.
3. Permissions and settings
One of the key features of Galxe channels and categories is the ability to customize permissions and settings for each. Server administrators can manage permissions for members, allowing or restricting access to certain channels or categories. This ensures that only relevant members can participate in specific discussions, providing a secure and controlled communication environment.
| Permissions | Description |
|---|---|
| Read Messages | Allows members to view messages within a channel. |
| Send Messages | Allows members to send messages within a channel. |
| Manage Messages | Allows members to delete or edit messages within a channel. |
| Manage Channels | Allows members to create, delete, or modify channels within a category. |
By understanding and utilizing Galxe channels and categories effectively, you can streamline communication, enhance collaboration, and create a more organized and efficient server environment on Discord Galxe (GAL).
Step 2: Creating and Managing Galxe Channels
Once you have installed Discord Galxe (GAL) and set up your account, it’s time to create and manage channels in order to communicate effectively within your community or team. Galxe channels allow you to organize conversations and discussions based on different topics or interests.
1. Creating a New Channel
To create a new Galxe channel, follow these simple steps:
- Open Discord and navigate to your server or community.
- Click on the “+” button next to the channel list on the left-hand side.
- Choose “Create Channel” from the dropdown menu.
- Enter a name for your channel in the provided field.
- Optionally, you can add a channel description to provide more context about the channel’s purpose.
- Select the appropriate channel type (e.g., text channel, voice channel).
- Click “Create Channel” to create the new Galxe channel.
2. Managing Channel Permissions
Once you have created a Galxe channel, you may want to manage the permissions to control who can access and interact with the channel. Here’s how you can do it:
- Right-click on the channel name in the channel list.
- Select “Edit Channel” from the context menu.
- In the “Permissions” section, you can customize the channel’s permissions by adding or removing roles or individual users.
- Assign appropriate permissions to each role or user based on what actions they should be able to perform.
- Click “Save Changes” to apply the new permissions.
Note: It’s important to carefully manage channel permissions to ensure the privacy and security of your community or team.
By following these steps, you can create and effectively manage Galxe channels in Discord for efficient communication and collaboration. Remember to organize your channels based on topics or interests to keep conversations structured and easily accessible for your community members.
FAQ:
What is Discord Galxe and how can it be used for communication?
Discord Galxe is a communication platform that allows users to have efficient and organized conversations. It can be used for various purposes such as gaming communities, professional discussions, or social groups. It offers features like voice and video calls, text messaging, file sharing, and screen sharing.
Are there any advantages to using Discord Galxe for communication?
Yes, there are several advantages to using Discord Galxe for communication. Firstly, it has a user-friendly interface that makes it easy to navigate and use. Secondly, it offers a wide range of features that can enhance communication, such as voice and video calls, text messaging, and file sharing. Lastly, it allows for efficient and organized communication through the use of channels and groups.
Can Discord Galxe be used for professional communication?
Yes, Discord Galxe can be used for professional communication. Many companies and organizations use Discord Galxe as a platform for team collaboration and communication. It offers features like voice and video calls, text messaging, and file sharing, which can be useful for discussing projects, sharing updates, and coordinating tasks.
Is Discord Galxe only for gamers?
No, Discord Galxe is not only for gamers. While it was initially popularized as a platform for gamers to communicate while playing games, it has since evolved into a versatile communication platform that can be used by anyone. It is now used by various communities, businesses, and social groups for communication and collaboration.
How can Discord Galxe improve communication efficiency?
Discord Galxe can improve communication efficiency in several ways. Firstly, it allows for real-time communication through voice and video calls, which can help facilitate quick and direct conversations. Secondly, it offers text messaging features that allow for asynchronous communication, where messages can be sent and received at any time. Lastly, it provides the ability to create channels and groups, which can help organize conversations and make it easier to find and access relevant information.